! REPORT
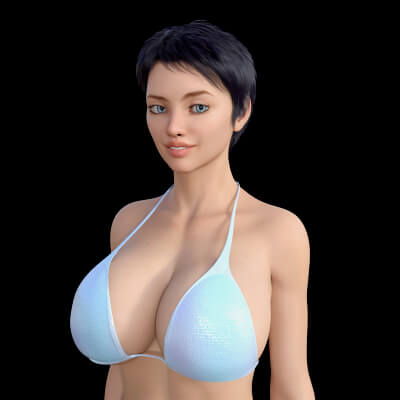
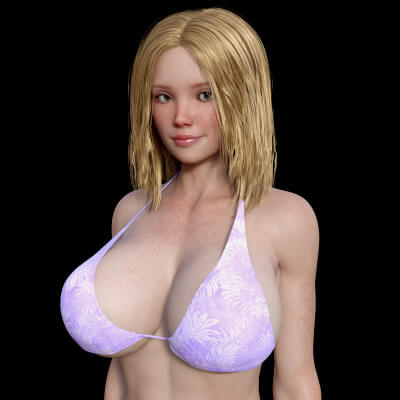
Becki and Gina - Outside the Break Room
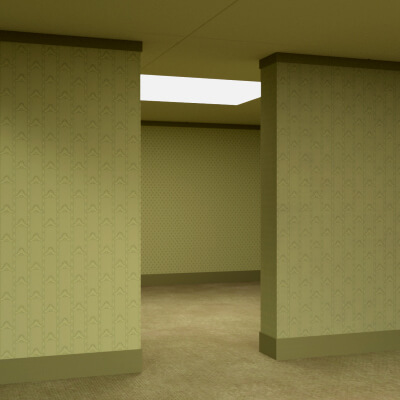
3D Render by GiaPhoto-3DTwo employees of my fictional nightclub hanging backstage. Gina appears to be impressed with Becki's ample assets.
As usual, custom clothes and prop graphics by me in Affinity Photo 2.
As usual, custom clothes and prop graphics by me in Affinity Photo 2.
You make me blush. I can't express how much I appreciate your compliments.
Let me take this opportunity to give you (and anyone else who cares) a semi-simple breakdown of my skin methods.
I believe every artist has an ideal of the female form. (I prefer short girls 4'10" - 5'2" with a slim to medium frame) But I digress - regardless of height, the musculature is what makes my canvas work. I rely on my years as a portrait photographer to guide me. Photography is about shadows and highlights. This is why I sculpt my characters with exaggerated muscle tone, because these curves create the highlights and shadows. So in my first couple of years of 3D learning, I primarily acquired muscle morph dials for this purpose. There are dozens available here and on other sites.
Step 1 is replacing the skin. Hundreds of artists put out great skins, and some not so great. To achieve consistency, I use one artist on all of my models. My skin of choice comes from Sabby. Unfortunately, she stopped releasing new G8 models in early 2024, but she still does G9 and there is a huge catalog of her G8 models available on a few different sites, both alone and in collaborations, including JASA, SASE, FWSA, and a few others. To my eye, they are the best.
Step 2 is catching the light and shadow. Many pro Real Life models use baby oil to create those gradients on skin. So I set out attempting to duplicate the shine of baby oil on skin. My go-to filter set is the Altern8 Skin Shader System for Genesis 8 by 3Diva. It is on EVERY render I do. Primarily, I use the Translucency and Shine filters.
Step 3 is the lighting setup. I try to duplicate the methods I used as a real-world photographer. 1, 2, or 3 light set-ups, depending on the setting, style, and mood of the piece. The key is experimentation. Many tutorials exist on YouTube.
Step 4 exists in the render setting window of Daz Studio. In the Progressive Rendering Tab, I set Max Samples at 10000 - Max Time at 14400 - Rendering Quality Enable to on - and Render Quality at 4.
Next is the Filtering Tab: Noise Degrain Filter set to 4 - I prefer the Mitchell Pixel Filter - Filter Radius set to 0.80.
I rarely vary these settings and I always render to a .png format.
These 4 steps get me to the post (Affinity/Photoshop) stage of the work. Honestly, I have years of photo retouch experience, which makes that job so much easier for me (sorry). Here is a simplified version:
I start by adjusting individual color layers, principally skin tones and key light colors, with a Selective Color Layer. Next, I sharpen the eyes, mouth, hair edges, and other sections I want to "pop out" with the sharpening tool. It also helps the eyes become the focus of the image. I always recommend a low percentage of opacity to avoid pixel distortion. I often add a highlight "dot" of white (it's called a catch light) with a very small brush diameter.
Next, I dodge and burn highlights and shadows for contrast, clarity and "pop" (like the eyes and muscle tone and clothing folds). If I missed any "poke throughs" in clothing while rendering, I fix those with the clone stamp tool and/or the blend stamp tool.
The final steps are an overall color saturation boost (no more than 8%, usually 6%) and an old sharpening trick I will share with you here: I duplicate the entire image one layer up and run a High Pass filter on it at a 2 pixel radius. Next, I change that layer blending mode to overlay and merge it down.
Voilà! Instant image sharpness POP! Lastly, I place my watermark and save a .jpg copy for posting.
I hope you all find this helpful in your process.
~ GIAPhoto-3D
REPLY
! REPORT
Becki and Gina - Outside the Break Room
 x1 [+]
Fri, Sep 05, 2025 96
96
 2
2
 96
96
16
 2
2Software Used
Artist Stats
Member Since:
Karma:
Followers:
Likes Received:
Karma:
Followers:
Likes Received:
Jan, 2021
5,957
23
448
5,957
23
448
Gallery Images:
Wallpaper Images:
Forum Topics:
Marketplace Items:
Wallpaper Images:
Forum Topics:
Marketplace Items:
36
0
0
0
0
0
0

151

27

5

2


