Free 3D
 3D Print Models
 3D Scans
 Animation & MoCap
 Textures
 Materials
 Skin Reference
 2D Game Assets
 Sound Effects
 Brushes & Tools
 Reference Photos
 Stock Images
 HDR Images
 3ds Max
 Maya
 Blender
 Unreal Engine
 Unity
 ZBrush
 Cinema 4D
 LightWave
 Marmoset
 SketchUp
 FBX
 DAE
 DXF
 GLB

! REPORT

Akari Aizawa Ultra-Simple Skin and Lighting Bundle
3D Render by snakeskinjkt# Akari Aizawa (Coming Soon for Sale) – Beautiful, Lightweight, and Simple!
**Fast rendering, reusable skin materials, and the DAZ Studio workflow I've always wanted.**
First of all, sorry for yet another long post! (Haha!)
I've already shared quite a few updates about Akari Aizawa, including her body shape, Iray surfaces, textures, and lighting.
I know some of these explanations are rather technical, and I certainly don't expect everyone to read everything.
However, since I'm preparing to sell this figure, I want to properly explain its design and practical features rather than leave out useful information.
**Please feel free to read only the sections that interest you!**
Ironically, my explanations keep getting longer, but **the product itself is designed to make rendering simpler! (Haha!)**
This time, I'd like to focus on how these features actually help in my everyday workflow.
---
## Chapter 1: Almost Straight Out of the Box — A Render in About 30 Seconds!
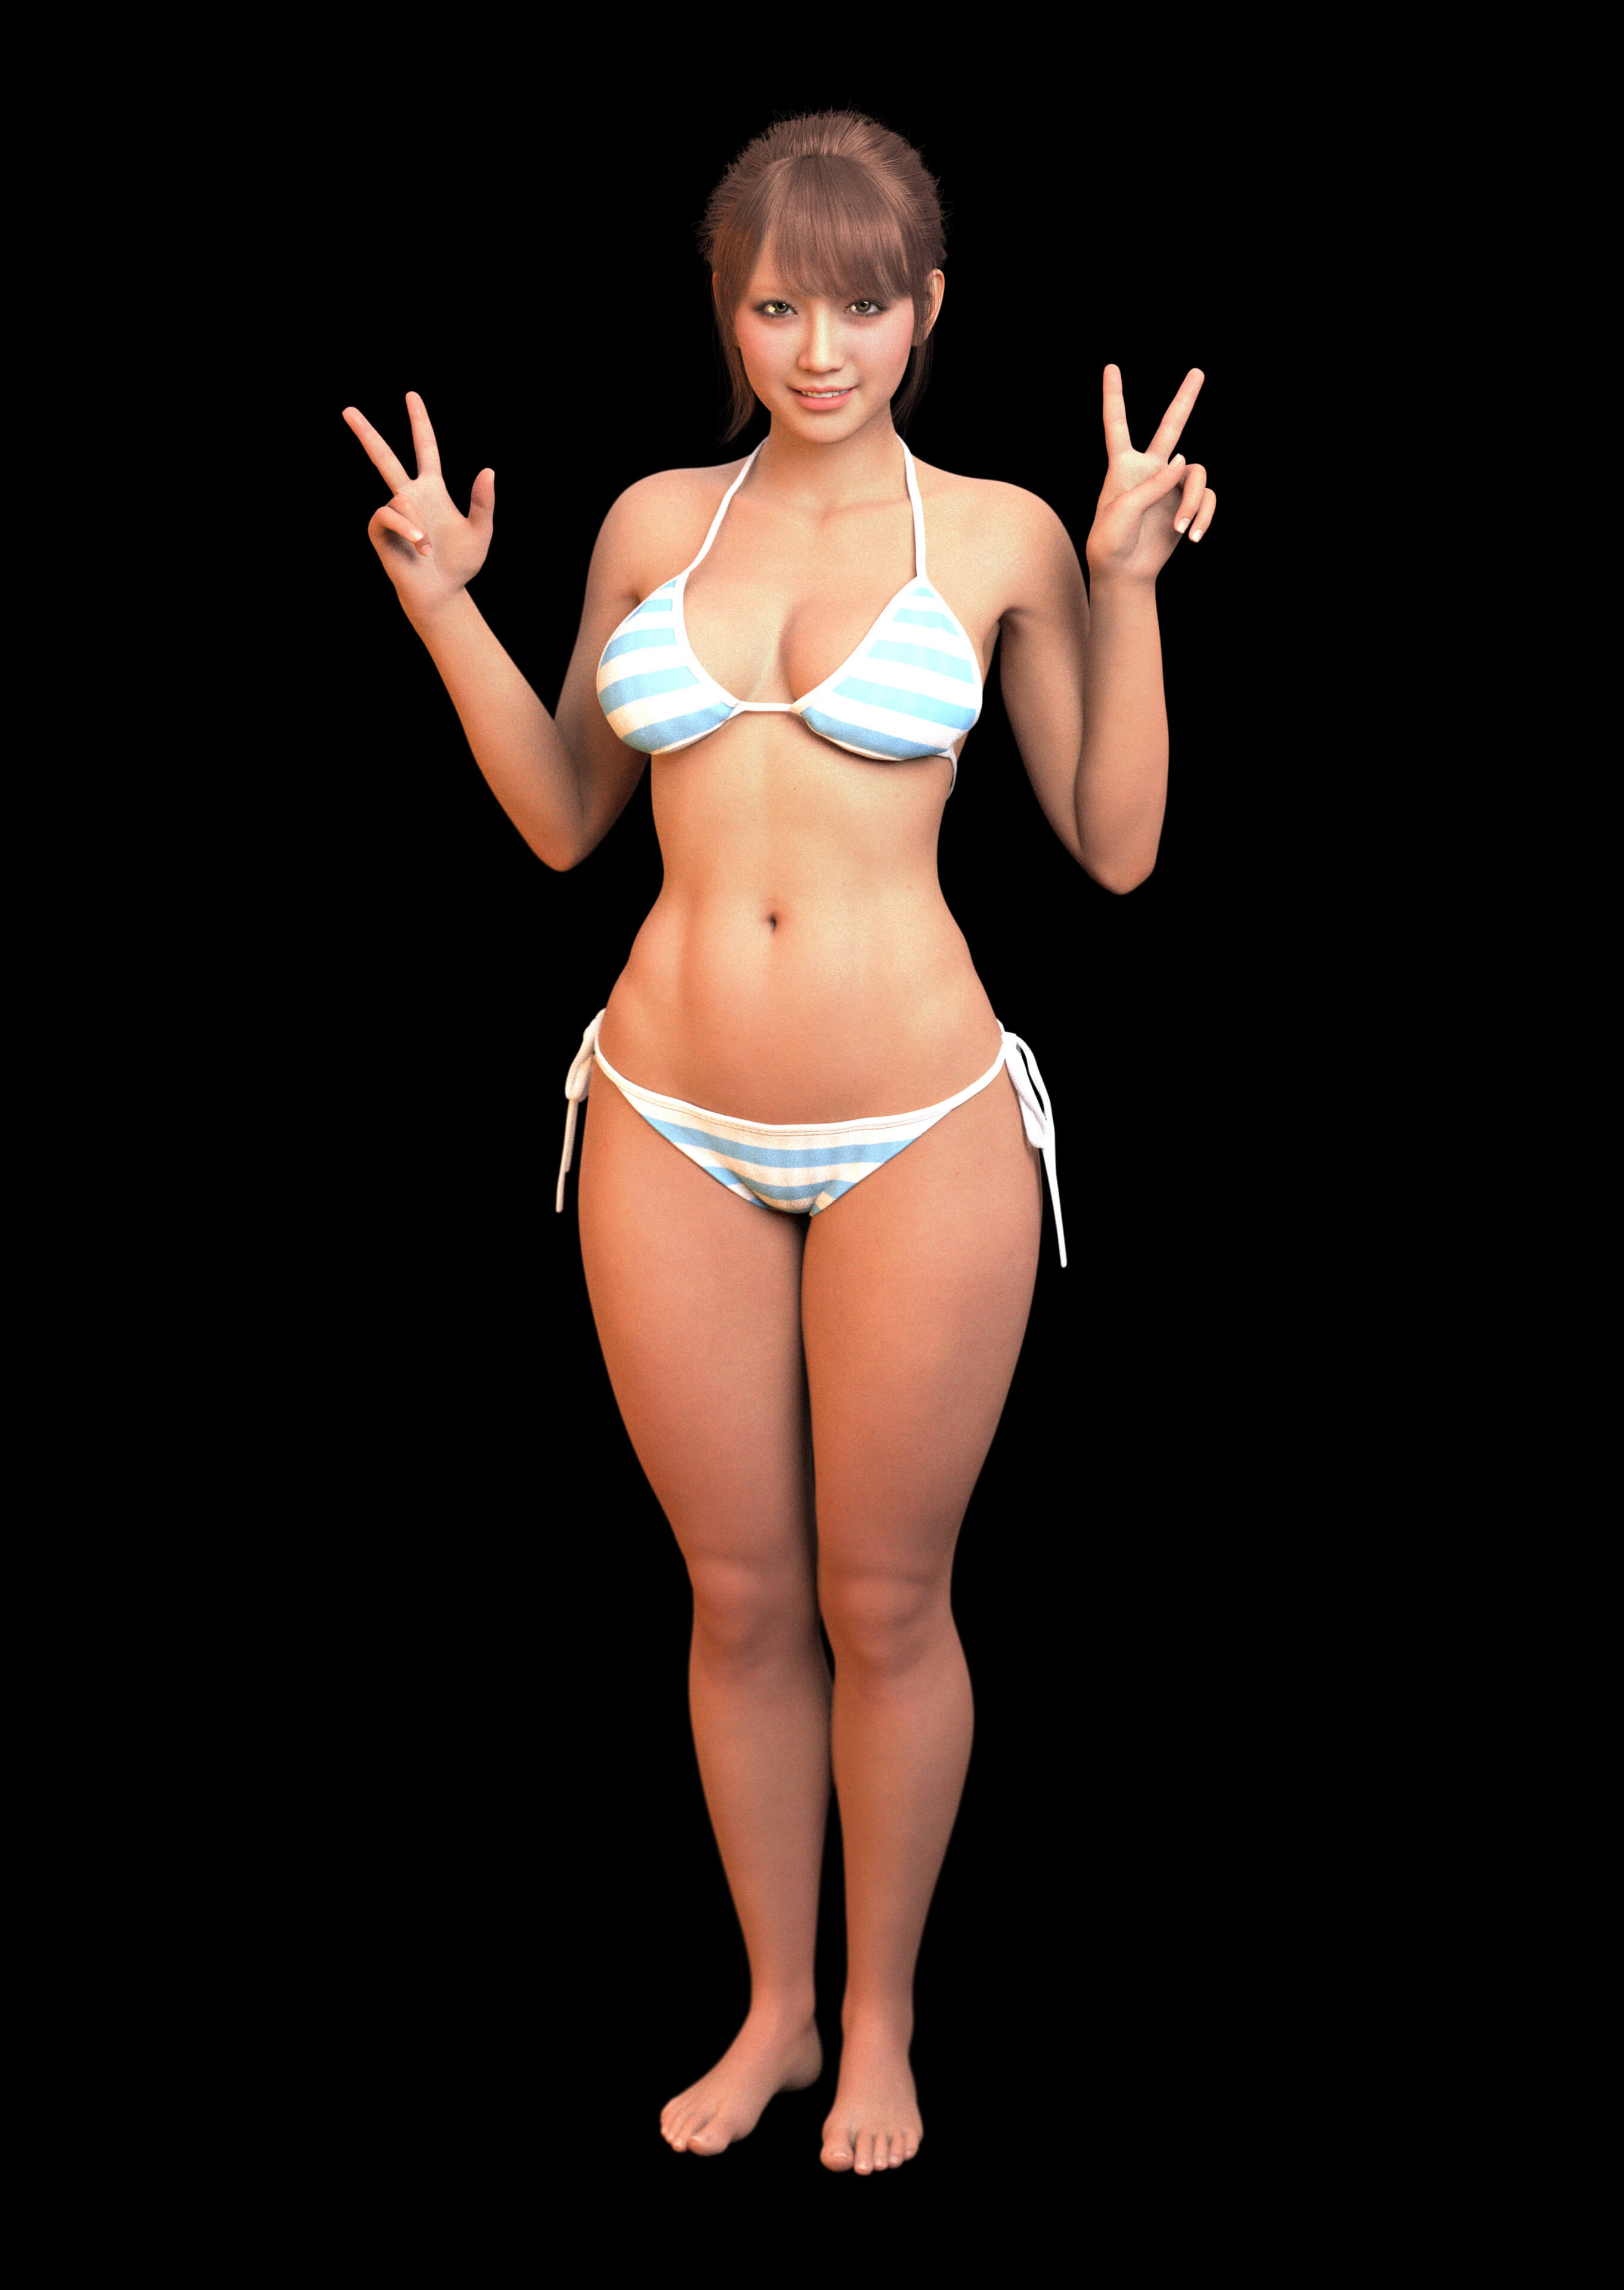
### Image 1 — A Simple Rendering Example
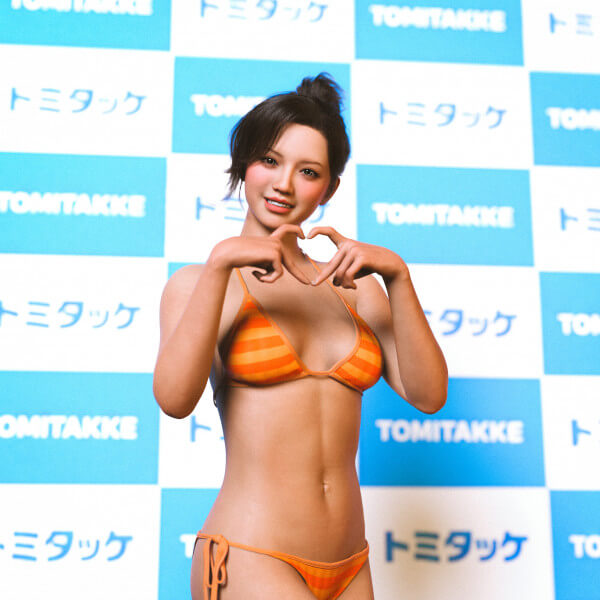
For the first image, I loaded Akari, applied a pose, added a swimsuit and hair, and loaded the three included lights: **Ceiling Dual Area Light, Main Light, and Fill Light**.
I left the Ceiling Light unchanged and simply moved the Main Light and Fill Light a little farther away.
**With Max Samples set to just 100, the render finished in approximately 30 seconds! (Haha!)**
No complicated adjustments to the lighting or skin materials were needed.
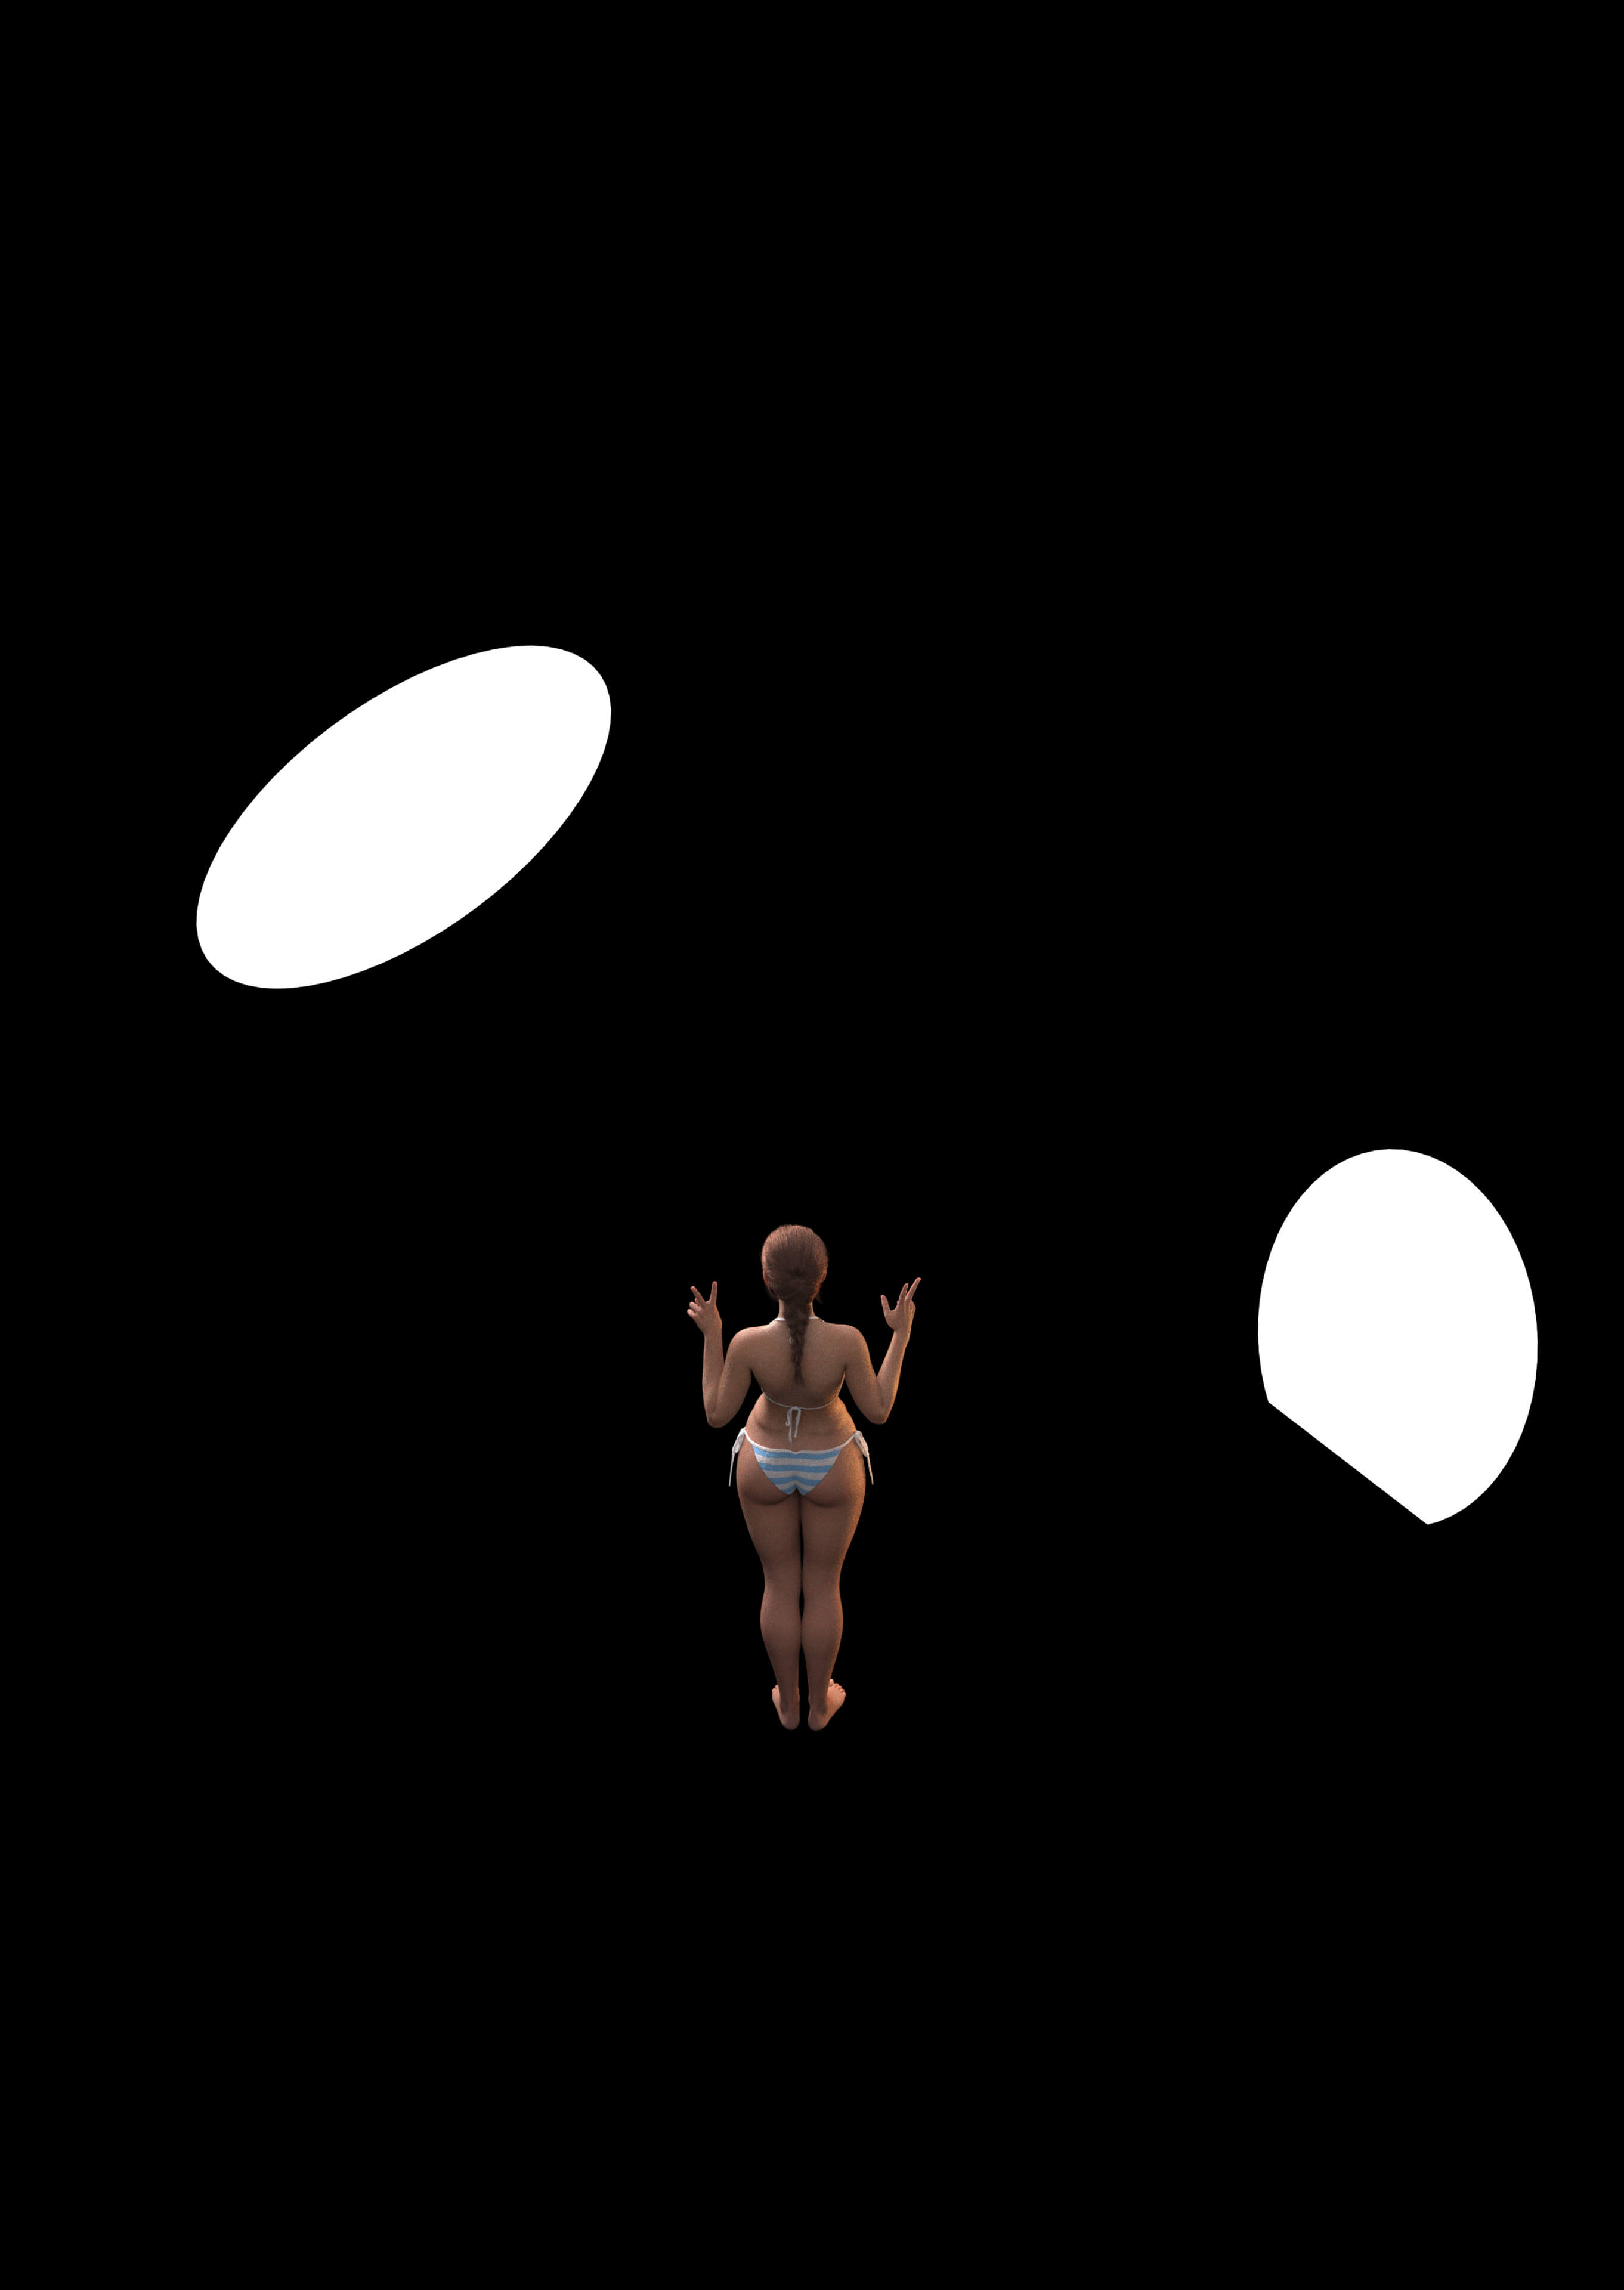
### Image 2 — Light Positions
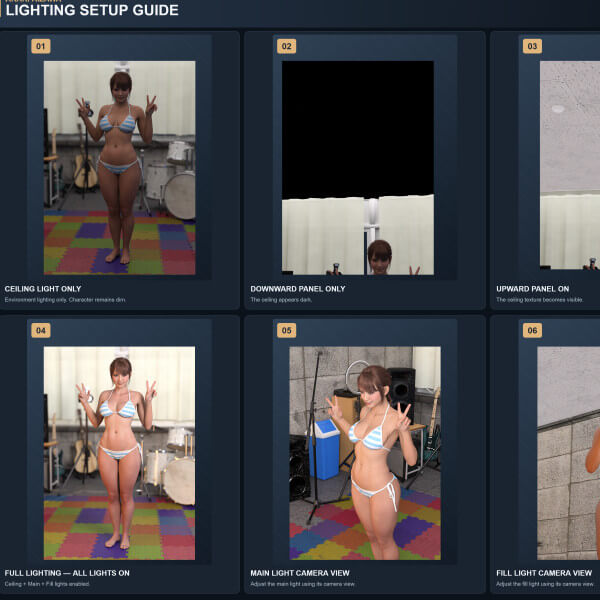
The second image shows the lighting arrangement used for the first render.
**The included lights are preset for a figure positioned at the world origin (0, 0, 0), so they load directly into their intended starting positions.**
They're set slightly brighter to account for light being blocked by furniture and other objects indoors.
Since this scene has no obstacles, simply moving the Main Light and Fill Light a little farther away was enough.
### My Usual Rendering Workflow
I'm currently using an RTX 4080, but my basic rendering settings haven't changed since my RTX 3070 days.
Even for commercial projects and multi-character scenes, **I keep each render within five minutes**. All the renders I've shared so far use **Max Samples of 200 or less**.
Sometimes I even use a little remaining noise as part of the visual style.
Of course, rendering times depend on the hardware and scene complexity.
**Simple lighting, naturally responsive skin surfaces, and an optimized texture setup** are what make this workflow possible.
---
## Chapter 2: Beautiful Skin with Only About 22 Texture Images!
My goal wasn't simply to reduce the number of texture maps.
**I wanted to preserve the details that make skin beautiful while removing unnecessary complexity.**
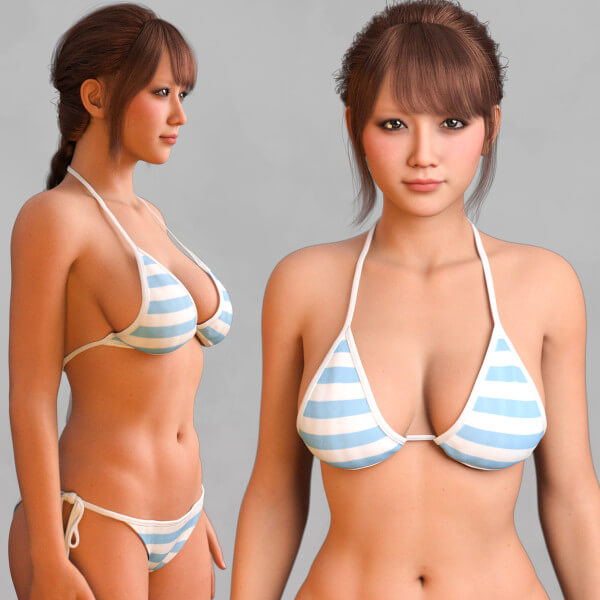
Important details such as pores, fine skin texture, and subtle surface irregularities are carefully preserved. Meanwhile, maps that contribute little to the final appearance have been reduced or shared wherever possible.
For example, **the torso uses an 8K skin texture, with the same image assigned to both Base Color and Translucency Color**.
This approach gives the complete figure a relatively compact setup of **approximately 22 distinct texture images**.
Some commercial figures use around 30–50 maps, but I'm very confident in the skin quality I've achieved with this smaller set.
**Keep what matters. Remove what doesn't.**
That's the philosophy behind my optimization.
---
## Chapter 3: Make Your Other Figures Look Better — and Keep Scenes Lightweight!
As I've mentioned in previous posts, **Akari's skin materials can also be reused on your existing Genesis 8 and 8.1 figures**.
Here's the method I particularly recommend: **keep each figure's original skin color while using Akari's optimized skin materials**.
### 1. My Recommended Method — Original Skin Color, Akari's Skin Quality!
The process is simple.
First, apply Akari's skin materials to another figure.
Next, compare that figure's original **Base Color and Translucency Color textures**, and choose whichever has the more natural skin color.
**Assign that same skin texture to both Base Color and Translucency Color.**
This is how I normally choose skin textures.
**Keep all the other skin maps and the fine-tuned surface parameters from Akari.**
As long as the original skin texture has natural colors, **this combination improves the skin appearance of most figures**.
At most, I usually need only minor brightness or contrast adjustments.
**You keep the character's original skin color and individuality while gaining Akari's natural, beautiful skin quality.**
This is the method I recommend most!
*Note: Akari's character morphs are designed for Genesis 8.1 Female only. Her skin materials can also be adapted to Genesis 8 figures with the appropriate UV layout.*
### 2. Apply Method 1 to Three Figures — Different Characters, Consistent Skin Quality!
**Applying the method above to three different figures has another major advantage.**
When each character uses its original skin materials, differences in reflections, SSS, and lighting response can make their skin look inconsistent within the same scene, even if each figure looks beautiful individually.
Instead, **keep each character's original skin color while using Akari's skin materials for all three**.
The characters remain visually distinct, but their skin quality and response to lighting become consistent, creating a more natural and cohesive scene.
**In my own work, this looks better than using three separate original material setups in most cases.**
Akari's surfaces also respond naturally to changes in light color and intensity, allowing each character to have a different appearance under the same consistent material system.
**Different skin colors, shared skin quality, and a beautiful overall balance.**
That's why I particularly recommend this method for multi-character scenes.
### 3. A Little Bonus — Even the Same Skin Texture Can Work for All Three! (Haha!)
Surprisingly, **using Akari's exact same skin texture on all three figures can still work quite well!** Her straightforward surface setup brings out differences in facial and body morphs, while natural responses to lighting help each character look distinct.
Of course, **Method 1 is still my recommendation**.
### 4. And It's Lightweight! Approximately 120 Images vs. 30!
Here's another benefit of sharing skin materials.
Imagine three different figures, each using approximately 40 texture images.
**Conventional setup: 40 3 = approximately 120 images**
With Akari's shared material approach, we start with approximately 22 images and reuse most of them across all three figures.
For the other two characters, we only need to add their **original skin textures** for the face, torso, arms, and legs.
**22 + (4 2) = approximately 30 distinct images**
So the comparison becomes:
**Conventional setup: approximately 120 images**
**Akari's shared setup: approximately 30 images**
**That's roughly 75% fewer distinct texture images in this example!**
Of course, this is an illustrative calculation assuming the remaining maps can be shared. Separate eye, mouth, or other character-specific textures would increase the count.
Also, **this is a reduction in the number of distinct images, not a claim of 75% lower VRAM usage**. Actual memory consumption depends on texture resolution and other factors.
Still, sharing texture maps can significantly reduce unnecessary duplication in multi-character scenes.
**Preserve each character's individuality, create consistent and beautiful skin, and keep the scene lightweight.**
Beauty, consistency, and efficiency — that's what I wanted to achieve with Akari's skin materials.
---
## Chapter 4: A Little Bonus — Natural Skin Even When You Change the Scale!
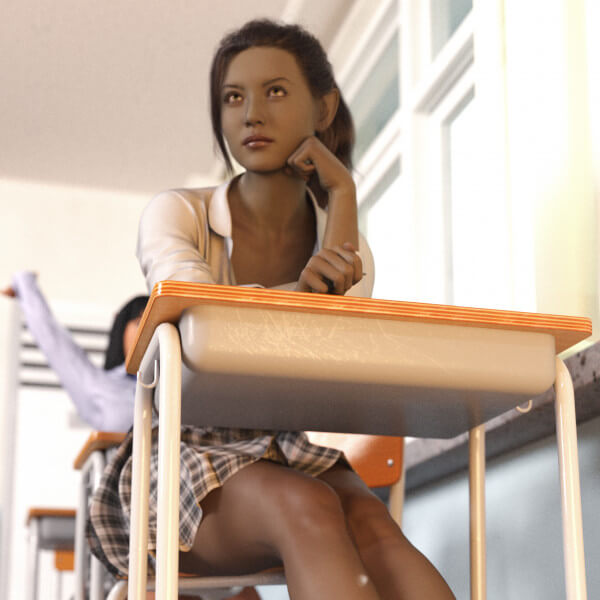
In my work, I sometimes **scale a character and an entire room to around 180% to give myself more freedom with camera angles in tight spaces**.
For unusual scenes, I may also scale a character down to 50% while enlarging buildings or furniture to 200%.
**Akari's skin surfaces are deliberately balanced, without extreme parameter values, to accommodate this kind of flexibility.**
In my workflow, even at scales around **0.5to 2 and sometimes beyond**, I can generally leave the skin parameters, including SSS, unchanged and adjust only the lighting.
---
## Chapter 5: More Than Just a Figure — My Own “nesis 10 (Haha!)
**This product is my attempt to create the DAZ Studio workflow I've always wanted for myself.**
I didn't simply want another beautiful figure.
I wanted **beautiful skin, practical lighting, fewer unnecessary textures, and attractive renders without endless adjustments**.
I approached this project with the determination to create my own version of **“nesis 10.*
The name is a joke, but **I'm completely serious about the idea behind it! (Haha!)**
So here's a slightly outrageous suggestion:
**Throw out your old lighting setup and try the included lights!**
And while you're at it, **try Akari's skin materials on your existing Genesis 8 and 8.1 figures!**
In my own work, I usually leave the Ceiling Light alone. I position the Main Light above-right and the Fill Light below-left, then make small adjustments through their dedicated camera views or simply change their distance from the character.
**My adjustments are actually pretty rough and simple! (Haha!)**
Being able to create beautiful renders with such simple controls is exactly what I wanted.
I still believe DAZ Studio offers exceptional value for creating photorealistic human characters.
I want to build on its strengths — beauty, flexibility, reusability, and ease of use.
**This bundle is more than just another figure. It's my attempt to make everyday DAZ Studio production simpler, faster, and more enjoyable.**
And I intend to keep improving both visual quality and practical usability in my future products.
---
## Chapter 6: A Few Final Thoughts Before You Buy
Finally, I'd like to explain what this product is really designed for.
**My goal is to help artists create beautiful, appealing renders in as little time as possible.**
Rather than spending hours perfecting every tiny detail, I've focused on achieving satisfying results with minimal adjustments.
Of course, experienced artists who enjoy spending hours refining every detail may find this approach a little too simple.
And if the sample renders I've shared don't appeal to your personal taste, this product may not be the right fit for you.
However, **I believe there's real value in beautiful, lightweight, reusable materials that are easy to work with**, especially when producing multiple shots or scenes.
**I didn't create this bundle to help perfect just one image over many hours. I created it to help produce many beautiful images with less effort.**
That's what I genuinely wanted for my own work, and what I hope **Akari Aizawa – Ultra-Simple Skin & Lighting Bundle** can offer other artists as well.
Thank you very much for reading this long explanation — or even just the sections that interested you!
And to everyone who has followed Akari's development through my many posts, **thank you sincerely for your patience, interest, and support!**
**Fast rendering, reusable skin materials, and the DAZ Studio workflow I've always wanted.**
First of all, sorry for yet another long post! (Haha!)
I've already shared quite a few updates about Akari Aizawa, including her body shape, Iray surfaces, textures, and lighting.
I know some of these explanations are rather technical, and I certainly don't expect everyone to read everything.
However, since I'm preparing to sell this figure, I want to properly explain its design and practical features rather than leave out useful information.
**Please feel free to read only the sections that interest you!**
Ironically, my explanations keep getting longer, but **the product itself is designed to make rendering simpler! (Haha!)**
This time, I'd like to focus on how these features actually help in my everyday workflow.
---
## Chapter 1: Almost Straight Out of the Box — A Render in About 30 Seconds!
### Image 1 — A Simple Rendering Example
For the first image, I loaded Akari, applied a pose, added a swimsuit and hair, and loaded the three included lights: **Ceiling Dual Area Light, Main Light, and Fill Light**.
I left the Ceiling Light unchanged and simply moved the Main Light and Fill Light a little farther away.
**With Max Samples set to just 100, the render finished in approximately 30 seconds! (Haha!)**
No complicated adjustments to the lighting or skin materials were needed.
### Image 2 — Light Positions
The second image shows the lighting arrangement used for the first render.
**The included lights are preset for a figure positioned at the world origin (0, 0, 0), so they load directly into their intended starting positions.**
They're set slightly brighter to account for light being blocked by furniture and other objects indoors.
Since this scene has no obstacles, simply moving the Main Light and Fill Light a little farther away was enough.
### My Usual Rendering Workflow
I'm currently using an RTX 4080, but my basic rendering settings haven't changed since my RTX 3070 days.
Even for commercial projects and multi-character scenes, **I keep each render within five minutes**. All the renders I've shared so far use **Max Samples of 200 or less**.
Sometimes I even use a little remaining noise as part of the visual style.
Of course, rendering times depend on the hardware and scene complexity.
**Simple lighting, naturally responsive skin surfaces, and an optimized texture setup** are what make this workflow possible.
---
## Chapter 2: Beautiful Skin with Only About 22 Texture Images!
My goal wasn't simply to reduce the number of texture maps.
**I wanted to preserve the details that make skin beautiful while removing unnecessary complexity.**
Important details such as pores, fine skin texture, and subtle surface irregularities are carefully preserved. Meanwhile, maps that contribute little to the final appearance have been reduced or shared wherever possible.
For example, **the torso uses an 8K skin texture, with the same image assigned to both Base Color and Translucency Color**.
This approach gives the complete figure a relatively compact setup of **approximately 22 distinct texture images**.
Some commercial figures use around 30–50 maps, but I'm very confident in the skin quality I've achieved with this smaller set.
**Keep what matters. Remove what doesn't.**
That's the philosophy behind my optimization.
---
## Chapter 3: Make Your Other Figures Look Better — and Keep Scenes Lightweight!
As I've mentioned in previous posts, **Akari's skin materials can also be reused on your existing Genesis 8 and 8.1 figures**.
Here's the method I particularly recommend: **keep each figure's original skin color while using Akari's optimized skin materials**.
### 1. My Recommended Method — Original Skin Color, Akari's Skin Quality!
The process is simple.
First, apply Akari's skin materials to another figure.
Next, compare that figure's original **Base Color and Translucency Color textures**, and choose whichever has the more natural skin color.
**Assign that same skin texture to both Base Color and Translucency Color.**
This is how I normally choose skin textures.
**Keep all the other skin maps and the fine-tuned surface parameters from Akari.**
As long as the original skin texture has natural colors, **this combination improves the skin appearance of most figures**.
At most, I usually need only minor brightness or contrast adjustments.
**You keep the character's original skin color and individuality while gaining Akari's natural, beautiful skin quality.**
This is the method I recommend most!
*Note: Akari's character morphs are designed for Genesis 8.1 Female only. Her skin materials can also be adapted to Genesis 8 figures with the appropriate UV layout.*
### 2. Apply Method 1 to Three Figures — Different Characters, Consistent Skin Quality!
**Applying the method above to three different figures has another major advantage.**
When each character uses its original skin materials, differences in reflections, SSS, and lighting response can make their skin look inconsistent within the same scene, even if each figure looks beautiful individually.
Instead, **keep each character's original skin color while using Akari's skin materials for all three**.
The characters remain visually distinct, but their skin quality and response to lighting become consistent, creating a more natural and cohesive scene.
**In my own work, this looks better than using three separate original material setups in most cases.**
Akari's surfaces also respond naturally to changes in light color and intensity, allowing each character to have a different appearance under the same consistent material system.
**Different skin colors, shared skin quality, and a beautiful overall balance.**
That's why I particularly recommend this method for multi-character scenes.
### 3. A Little Bonus — Even the Same Skin Texture Can Work for All Three! (Haha!)
Surprisingly, **using Akari's exact same skin texture on all three figures can still work quite well!** Her straightforward surface setup brings out differences in facial and body morphs, while natural responses to lighting help each character look distinct.
Of course, **Method 1 is still my recommendation**.
### 4. And It's Lightweight! Approximately 120 Images vs. 30!
Here's another benefit of sharing skin materials.
Imagine three different figures, each using approximately 40 texture images.
**Conventional setup: 40 3 = approximately 120 images**
With Akari's shared material approach, we start with approximately 22 images and reuse most of them across all three figures.
For the other two characters, we only need to add their **original skin textures** for the face, torso, arms, and legs.
**22 + (4 2) = approximately 30 distinct images**
So the comparison becomes:
**Conventional setup: approximately 120 images**
**Akari's shared setup: approximately 30 images**
**That's roughly 75% fewer distinct texture images in this example!**
Of course, this is an illustrative calculation assuming the remaining maps can be shared. Separate eye, mouth, or other character-specific textures would increase the count.
Also, **this is a reduction in the number of distinct images, not a claim of 75% lower VRAM usage**. Actual memory consumption depends on texture resolution and other factors.
Still, sharing texture maps can significantly reduce unnecessary duplication in multi-character scenes.
**Preserve each character's individuality, create consistent and beautiful skin, and keep the scene lightweight.**
Beauty, consistency, and efficiency — that's what I wanted to achieve with Akari's skin materials.
---
## Chapter 4: A Little Bonus — Natural Skin Even When You Change the Scale!
In my work, I sometimes **scale a character and an entire room to around 180% to give myself more freedom with camera angles in tight spaces**.
For unusual scenes, I may also scale a character down to 50% while enlarging buildings or furniture to 200%.
**Akari's skin surfaces are deliberately balanced, without extreme parameter values, to accommodate this kind of flexibility.**
In my workflow, even at scales around **0.5to 2 and sometimes beyond**, I can generally leave the skin parameters, including SSS, unchanged and adjust only the lighting.
---
## Chapter 5: More Than Just a Figure — My Own “nesis 10 (Haha!)
**This product is my attempt to create the DAZ Studio workflow I've always wanted for myself.**
I didn't simply want another beautiful figure.
I wanted **beautiful skin, practical lighting, fewer unnecessary textures, and attractive renders without endless adjustments**.
I approached this project with the determination to create my own version of **“nesis 10.*
The name is a joke, but **I'm completely serious about the idea behind it! (Haha!)**
So here's a slightly outrageous suggestion:
**Throw out your old lighting setup and try the included lights!**
And while you're at it, **try Akari's skin materials on your existing Genesis 8 and 8.1 figures!**
In my own work, I usually leave the Ceiling Light alone. I position the Main Light above-right and the Fill Light below-left, then make small adjustments through their dedicated camera views or simply change their distance from the character.
**My adjustments are actually pretty rough and simple! (Haha!)**
Being able to create beautiful renders with such simple controls is exactly what I wanted.
I still believe DAZ Studio offers exceptional value for creating photorealistic human characters.
I want to build on its strengths — beauty, flexibility, reusability, and ease of use.
**This bundle is more than just another figure. It's my attempt to make everyday DAZ Studio production simpler, faster, and more enjoyable.**
And I intend to keep improving both visual quality and practical usability in my future products.
---
## Chapter 6: A Few Final Thoughts Before You Buy
Finally, I'd like to explain what this product is really designed for.
**My goal is to help artists create beautiful, appealing renders in as little time as possible.**
Rather than spending hours perfecting every tiny detail, I've focused on achieving satisfying results with minimal adjustments.
Of course, experienced artists who enjoy spending hours refining every detail may find this approach a little too simple.
And if the sample renders I've shared don't appeal to your personal taste, this product may not be the right fit for you.
However, **I believe there's real value in beautiful, lightweight, reusable materials that are easy to work with**, especially when producing multiple shots or scenes.
**I didn't create this bundle to help perfect just one image over many hours. I created it to help produce many beautiful images with less effort.**
That's what I genuinely wanted for my own work, and what I hope **Akari Aizawa – Ultra-Simple Skin & Lighting Bundle** can offer other artists as well.
Thank you very much for reading this long explanation — or even just the sections that interested you!
And to everyone who has followed Akari's development through my many posts, **thank you sincerely for your patience, interest, and support!**
Hey, I have read through your post, so she is a 8.1 Female character?
REPLY
! REPORT
snakeskinjkt
Karma: 973
Fri, Nov 06Yes, that's correct! Akari Aizawa is a Genesis 8.1 Female character.
Her head and body morphs are designed specifically for Genesis 8.1 Female.
However, the included skin materials can also be used with Genesis 8 figures by selecting the appropriate texture set (A or B).
Thank you for reading through my post!
Her head and body morphs are designed specifically for Genesis 8.1 Female.
However, the included skin materials can also be used with Genesis 8 figures by selecting the appropriate texture set (A or B).
Thank you for reading through my post!
Akari Aizawa Ultra-Simple Skin and Lighting Bundle
[+] Give Award


Fri, Nov 06 42

 2
4210
2
Add to Collection

10 Likes
Share This Render


Software Used
 Daz Studio

Artist Stats
Member Since:
Karma:
Followers:
Likes Received:
Karma:
Followers:
Likes Received:
Mar, 2024
973
12
491
973
12
491
Gallery Images:
Wallpaper Images:
Forum Topics:
Marketplace Items:
Wallpaper Images:
Forum Topics:
Marketplace Items:
48
0
0
0
0
0
0

31

4